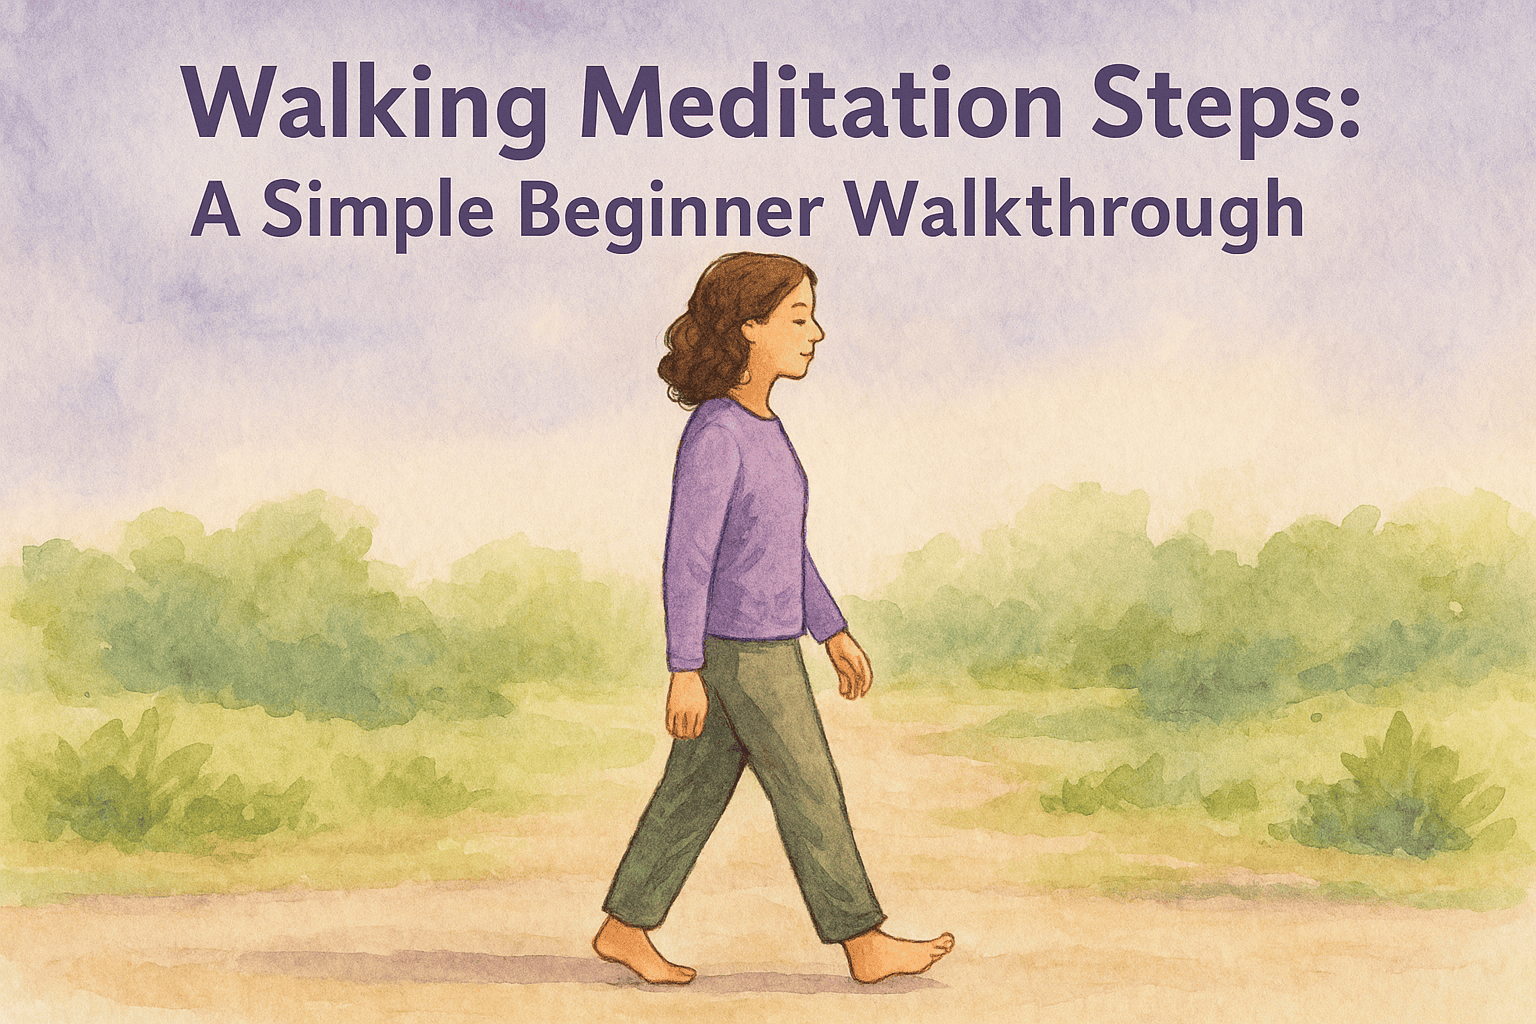
Walking Meditation Steps: A Simple Beginner Walkthrough
23 min read
You don’t need a cushion, a quiet room, or even ten free minutes to start meditating. Walking meditation takes something you already do every day, putting one foot in front of the other, and turns it into a focused, grounding practice. If you’ve been searching for walking meditation steps that actually make sense without the spiritual jargon, you’re in the right place. This guide breaks it down into clear, actionable instructions anyone can follow, even if you’ve never meditated before.
Walking meditation is especially useful during periods when your mind feels scattered or overstimulated, something many in our community know well. After a psychedelic experience, the integration phase asks a lot of your brain and body. At Afterglow Supplements, we build products that support your physical recovery after a session, but recovery isn’t only biochemical. Practices like walking meditation give you a structured way to process and ground yourself, complementing the nutritional support our protocol provides.
Below, you’ll find a complete beginner walkthrough: how to set up, where to walk, what to do with your attention, and how to build the practice into your routine. We’ll cover posture, pacing, breath coordination, and common mistakes that trip people up. Whether you’re using this as a standalone mindfulness tool or as part of your post-experience integration toolkit, the steps are the same, simple, practical, and ready to use today.
What walking meditation is and why it works
Walking meditation is a formal mindfulness practice where movement itself becomes the object of your attention. Instead of sitting still and observing the breath, you move slowly and deliberately, tracking the physical sensations of each step as it happens. The practice is rooted in Buddhist traditions, particularly Theravada vipassana, but researchers and clinicians have since studied it outside any religious context and confirmed measurable benefits for stress reduction, sustained attention, and mood regulation.
The difference between sitting and walking meditation
Both sitting and walking meditation share the same core goal: training your attention to stay with present-moment experience rather than drifting into thought loops. The key difference is the object of focus. In sitting practice, you typically anchor to the breath. In walking practice, you anchor to the physical sensations of movement, such as the pressure of your foot against the ground, the shift of weight, and the swing of your arms.
This makes walking meditation more accessible for people who find stillness uncomfortable or who struggle to sit for extended periods. If you’ve tried sitting meditation and found your restlessness working against you, walking gives that energy somewhere useful to go. You’re not fighting the urge to move; you’re channeling it into focused, deliberate attention.
Walking meditation works with your body’s natural momentum rather than against it, which makes it easier to sustain attention over time.
What your brain does during mindful movement
When you walk with deliberate, focused awareness, your brain responds in a specific way. Research shows that gentle aerobic movement increases blood flow to the prefrontal cortex, the region responsible for attention, decision-making, and emotional regulation. Combining that increased circulation with a mindfulness anchor means you train attentional control precisely when your brain is most receptive to doing so.
Your nervous system also responds differently to slow, intentional walking compared to goal-directed walking. Slower pacing activates the parasympathetic nervous system, pulling you out of a heightened stress response and into a calmer, more grounded state. This is why even a short session of mindful walking can shift your mood noticeably, not through distraction, but through direct physiological regulation.
Why it fits naturally into recovery and integration
After any intense experience, whether a demanding week, a difficult conversation, or a psychedelic session, your system often needs time to process and reorganize. Walking meditation gives you a structured container for that. Rather than letting your mind race or forcing yourself to analyze everything at once, you redirect attention to the body and allow processing to happen at a quieter, more sustainable level.
Following the walking meditation steps in this guide requires no previous experience and no special setting. You don’t need to know anything about neuroscience or meditation theory to benefit. What you do need is a willingness to pay close attention to what’s already happening in your body as you move, and to return your attention there each time it wanders. That returning, again and again, is the actual practice. It’s also where most of the benefit accumulates.
Before you start: safety, goals, and expectations
Walking meditation is low-risk compared to most physical activities, but a few practical checks before your first session can protect both your focus and your body. If you have a balance condition, joint pain, or any neurological issue that affects your gait, consult your doctor before adding structured mindful movement to your routine. For everyone else, the most important preparation is mental: you need realistic expectations about what this practice does and doesn’t deliver.
Physical safety and environment checks
Before you work through any of the walking meditation steps in this guide, run through a short checklist. Choose footwear that gives you stable ground contact, because barefoot walking on uneven surfaces can shift your attention from sensation to injury prevention. Make sure your chosen space is free of tripping hazards such as loose cables, uneven paving, or heavy foot traffic. If you plan to walk outdoors, avoid routes that require frequent stops for traffic, since those interruptions break the rhythm and pull your attention outward.
Walk on a flat, familiar surface for your first few sessions
Wear flat-soled shoes or go barefoot on grass or a smooth indoor floor
Keep your phone on silent and out of your hand during the walk
Let someone know your location if you plan to walk somewhere isolated
Set a goal that matches where you are right now
Your first goal is not relaxation, and it is not some peak meditative state. Your first goal is simply to complete the session and notice what your attention does. Most beginners expect a calm, focused experience and instead find a mind that wanders constantly. That is not failure; that is the practice working exactly as designed.
Every time you notice your mind has wandered and bring it back, you have completed one repetition of the actual skill you are building.
Expect your first session to feel slightly awkward. You are doing something deliberate with a movement pattern your body has automated for decades, so some friction is normal. Set a time limit of five to ten minutes, finish it, and treat that as a complete success regardless of how focused you felt during it.
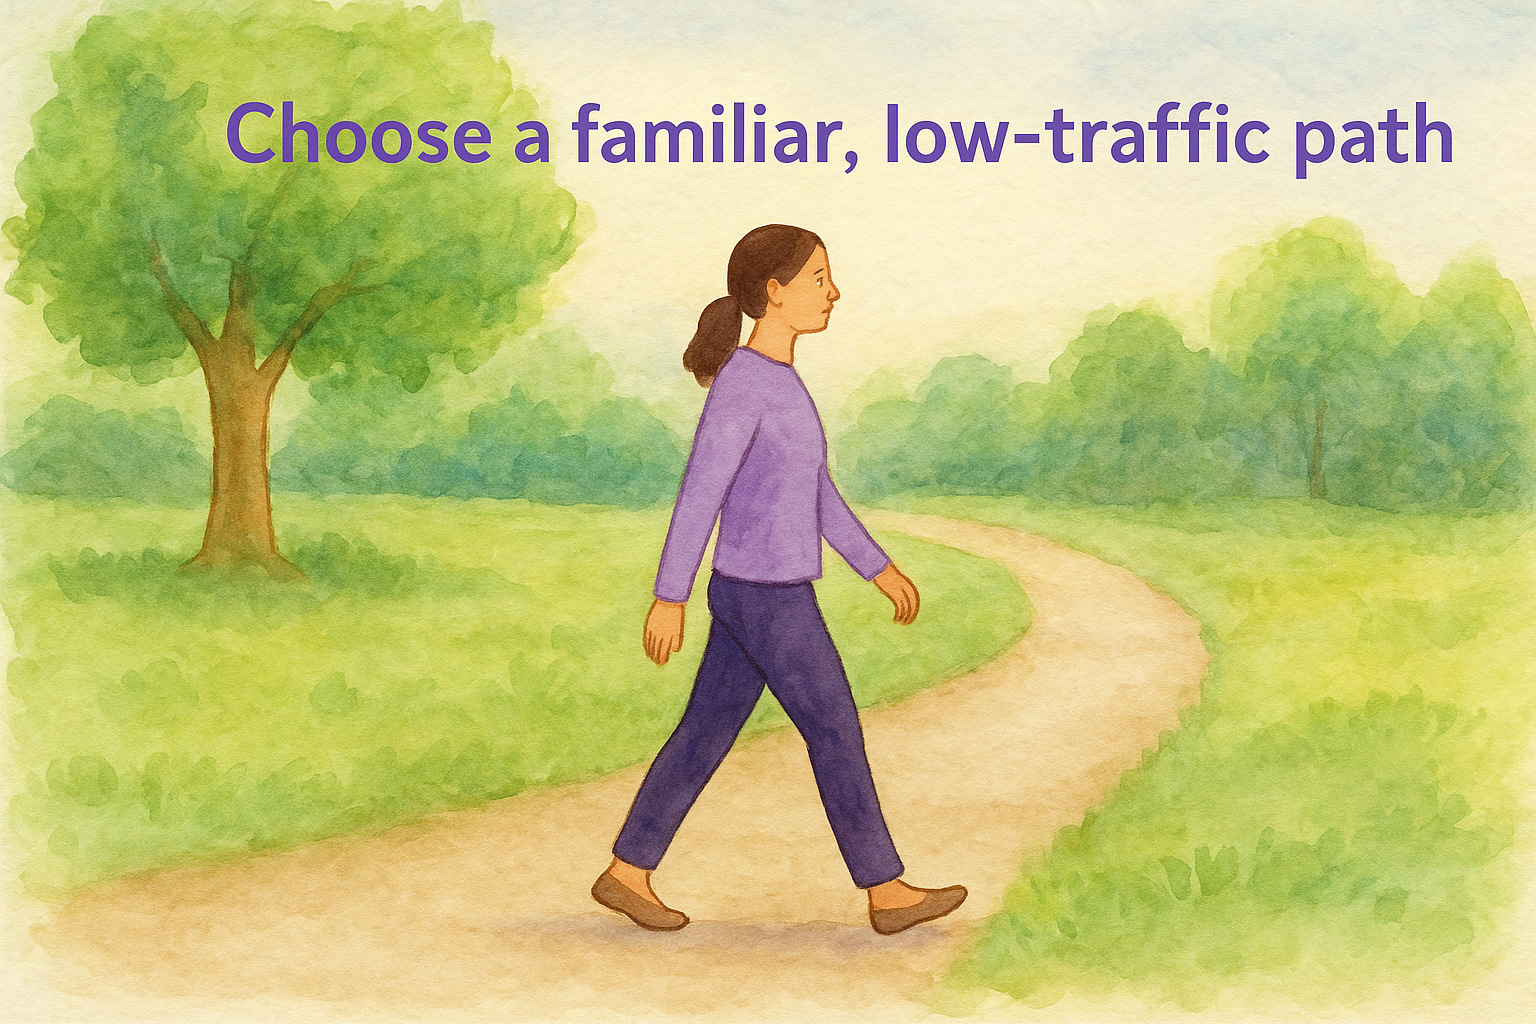
Step 1. Pick a route that supports focus and safety
Your route shapes everything else. A poor choice of location forces your brain to split attention between navigation and sensation, which defeats the purpose of the practice before you even begin. When working through the walking meditation steps in this guide, treat your route as part of the setup, not an afterthought.
Choose a familiar, low-traffic path
Pick a route you already know well enough to walk without thinking about it. Familiar ground means your brain doesn’t have to calculate distances, read signs, or make directional decisions mid-session. A 10-to-30-meter stretch of path that you simply walk back and forth works better for beginners than a long loop, because the turns become natural pauses rather than disruptions.
The simpler your route, the more attention you free up for the actual practice.
What makes a route work well for beginners:
Flat surface with no steps, steep inclines, or loose gravel
Low foot traffic so you rarely need to dodge other people
No traffic lights or road crossings that interrupt your rhythm
Clear endpoints such as a wall, bench, or tree so you know when to turn
A length of 10 to 30 meters that allows 20 or more steps before you turn
Indoor vs. outdoor routes
Both indoor and outdoor settings work, and your choice depends mainly on what’s available and what feels calming to you. A quiet hallway, a living room with furniture pushed aside, or a garden path all qualify. The key difference is sensory input: outdoor routes expose you to wind, sound, and light, which can enrich sensory awareness once you have some experience, but can also scatter attention when you’re just starting out.
Indoor routes give you tighter environmental control, which makes them easier to begin with. If you live somewhere with unpredictable weather or noise, start inside. Once you feel comfortable holding your attention anchor for a full five-minute session indoors, move outside and treat the added sensory input as part of the practice rather than a distraction you need to block out.
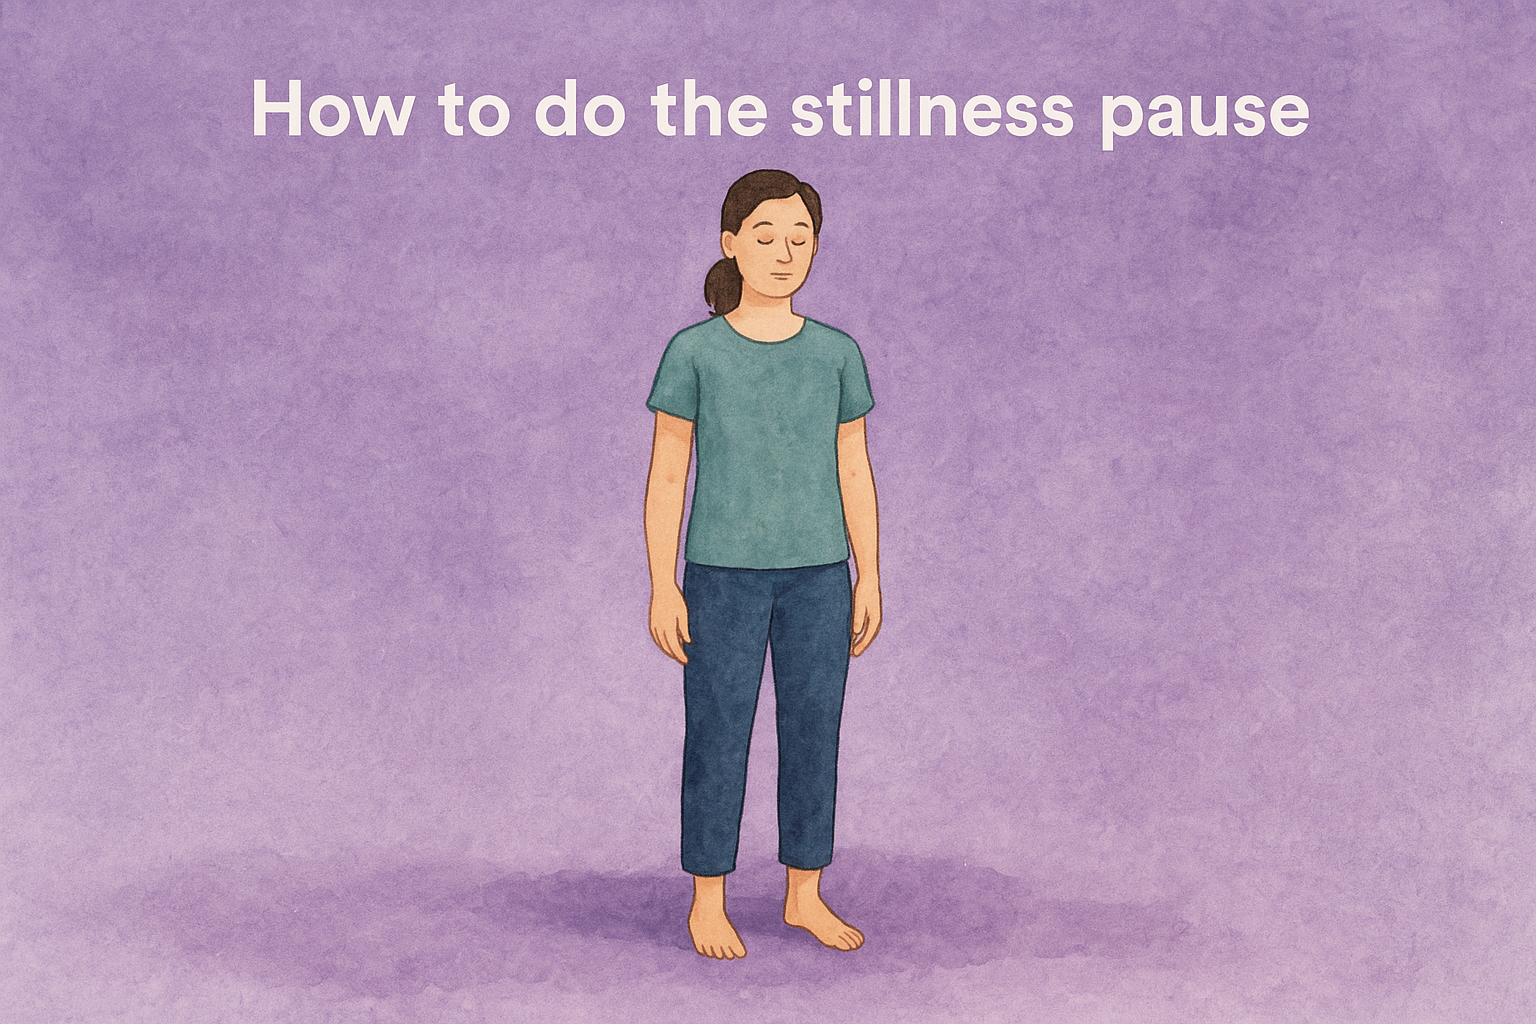
Step 2. Start with stillness to "arrive" in your body
Before you take your first step, stand still at one end of your chosen route. This pause is not a formality; it is the actual beginning of the practice. Most beginners skip this and start walking immediately, which means they carry the mental momentum of whatever they were doing before right into the session. Taking 30 to 60 seconds of stillness breaks that momentum and gives your attention a clean starting point.
How to do the stillness pause
Stand with your feet hip-width apart and let your arms hang naturally at your sides. Close your eyes if your balance allows, or drop your gaze to a point about two meters in front of you on the ground. Take three deliberate breaths, slower than your normal breathing pace, and feel the ground beneath your feet with each exhale. You are not trying to clear your mind; you are simply noticing that your body exists and is already doing things, like breathing, balancing, and responding to the surface under you.
Your attention is already present in your body before you ever take a step. The stillness pause just helps you notice that.
After your three breaths, shift your awareness to the soles of your feet. Notice the pressure, temperature, and texture you feel through your footwear or directly through the skin. Can you feel more weight on one foot than the other? Is there tension anywhere in your legs or hips? You don’t need to fix anything; observing what is already there is the entire point of this step.
What this prepares you for
This brief stillness directly sets up the rest of the walking meditation steps you will work through in this guide. When you start moving from a grounded, observing state rather than a distracted one, your attention anchor takes hold faster and holds longer during the walk. Think of it as calibrating your instrument before you use it. A musician tunes before playing, not during the performance, and you are doing the same thing with your attention before the session begins.
Once you feel that grounded, aware contact with the ground beneath you, you are ready to move.
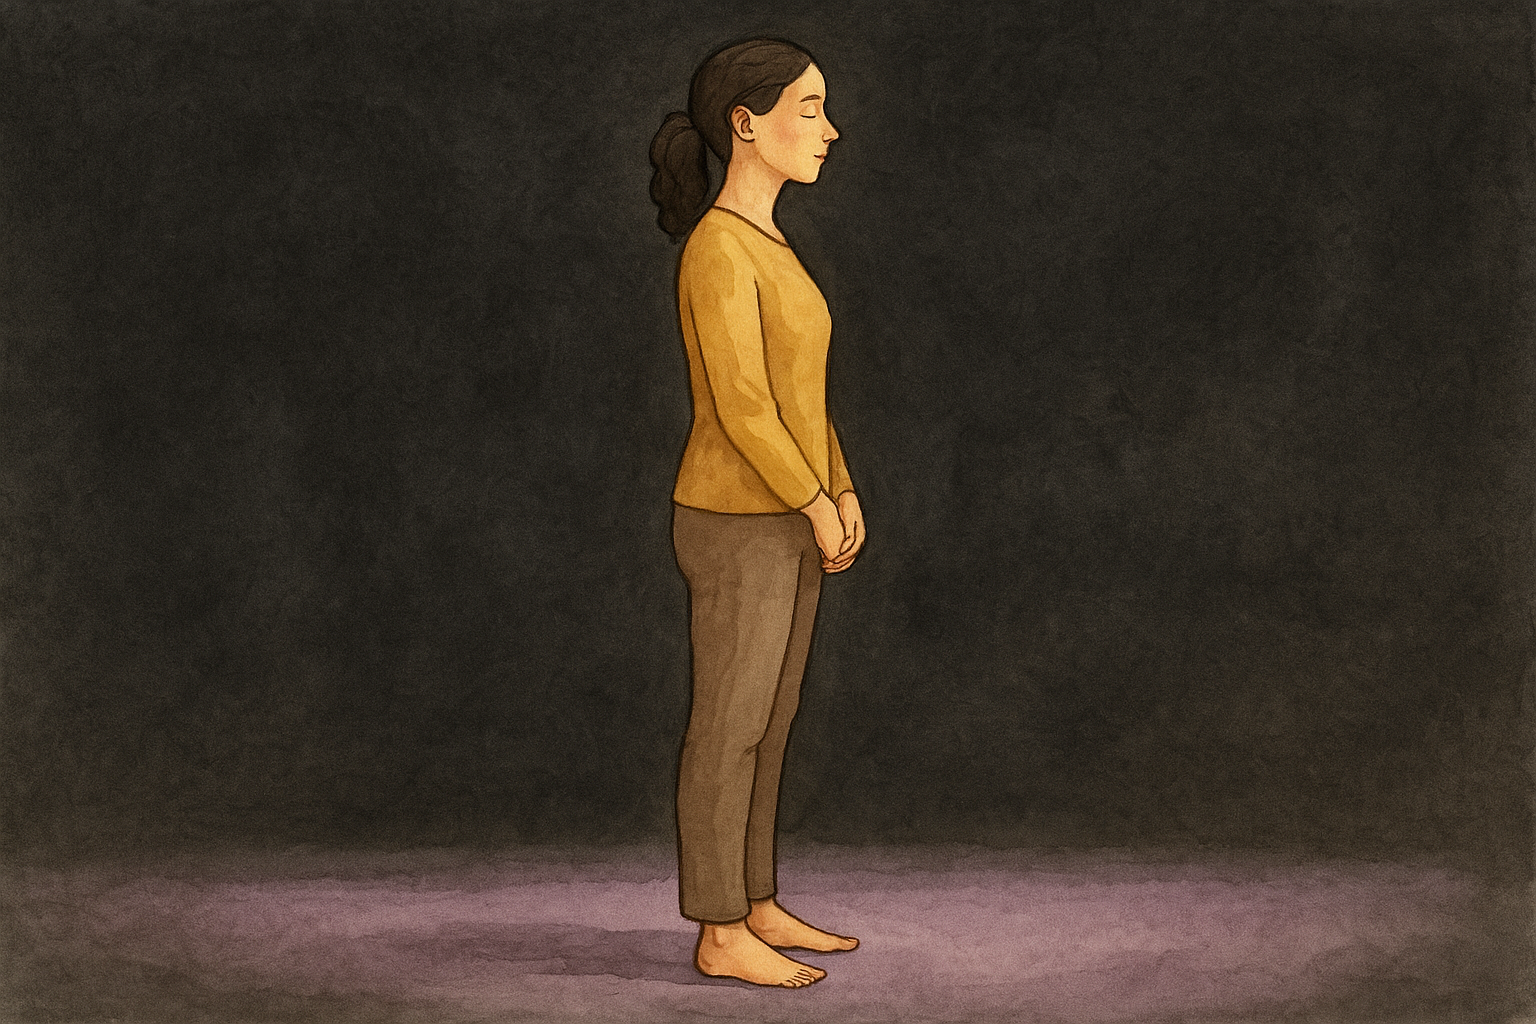
Step 3. Set your posture, gaze, and pace
The way you hold your body and direct your eyes during walking meditation directly affects how long your attention stays on the practice. Poor posture increases physical tension, which competes with your chosen anchor for attention. Before you take your first full step, lock in these three physical settings so your body supports rather than disrupts the walking meditation steps you are about to work through.
Posture: stack your body from the ground up
Stand tall without stiffening. Your spine should feel long, as if a thread gently pulls the crown of your head toward the ceiling. Let your shoulders drop away from your ears, soften your jaw, and allow a slight bend in your knees rather than locking them straight. Run through this quick posture checklist before you start moving:
Head: level, chin slightly tucked, not jutting forward
Shoulders: relaxed and down, not raised or rolled forward
Arms: hands clasped loosely in front, hanging at sides, or resting at your lower back
Knees: soft and unlocked, not rigid
Feet: hip-width apart at the start of each turn
Gaze: where your eyes go, attention follows
Keep your gaze soft and downward, aimed at a point roughly two to three meters ahead of you on the ground. You are not scanning for obstacles or reading anything; you are letting your visual field stay open without actively processing it. This downward, unfocused gaze reduces visual stimulation and signals to your nervous system that you are not in a reactive, goal-directed mode.
A soft downward gaze is one of the most underrated adjustments beginners can make, and it consistently helps attention settle faster during a session.
Avoid closing your eyes while walking. Closed eyes shift too much cognitive load onto your balance system, which then competes with the movement sensations you want to observe. Open, soft eyes keep you physically safe and mentally present at the same time.
Pace: slow down more than feels natural
Walk at roughly half your normal walking speed, or even slower. Most beginners underestimate how much slower that actually needs to be. A useful benchmark: each full step cycle, meaning one foot lifting, moving forward, and landing, should take two to three full seconds.
That deliberate slowness creates enough space within each movement for your attention to land on individual sensations rather than blurring them together. If you notice you are simply strolling, cut your speed in half again and stay there until the pace feels almost uncomfortably slow. That discomfort usually signals you have found the right speed.
Step 4. Choose one attention anchor that you can repeat
An attention anchor is the single sensation or phrase you return to every time your mind wanders during the walk. Picking one before you move, rather than improvising mid-session, removes a layer of decision-making from a moment when you need your attention fully available for the walking meditation steps ahead. One anchor, chosen deliberately and used consistently, trains your brain far more effectively than rotating between several options.
What makes a good anchor
A useful anchor for walking meditation has two qualities: it connects directly to physical movement, and you can repeat it in a short cycle that matches your pace. The most common anchors fall into three categories, and each one works. Your choice depends on which type of sensation you find easiest to notice clearly right now.
Anchor type
Example
Best for
Foot sensations
Feeling the heel, ball, and toe of each foot contact the ground
People who want a purely physical focus
Silent labeling
Saying "lift, move, place" in your mind with each step phase
People who find internal language grounding
Breath and step
Matching one breath cycle to two or three steps
People who already use breath in sitting practice
How to test and commit to your anchor
Before your session starts, test your anchor while standing still. If you chose foot sensation, press each foot into the ground and notice what you feel. If you chose silent labeling, say the labels once in your mind and check that the words come naturally without effort. If you chose breath and step, take two or three slow steps in place and see if the pairing feels manageable. Any anchor you can track without strain during that brief test is the right one for today’s session.
Once you commit to an anchor, do not switch it during the session, even if it feels dull or difficult to hold. The moment you abandon one anchor for another, you interrupt the repetition that builds attentional strength. Boredom with your anchor is not a sign to change it; it signals that your attention is stable enough to stay present, which is exactly what you are working toward.
Your anchor does not need to be interesting. It needs to be consistent.
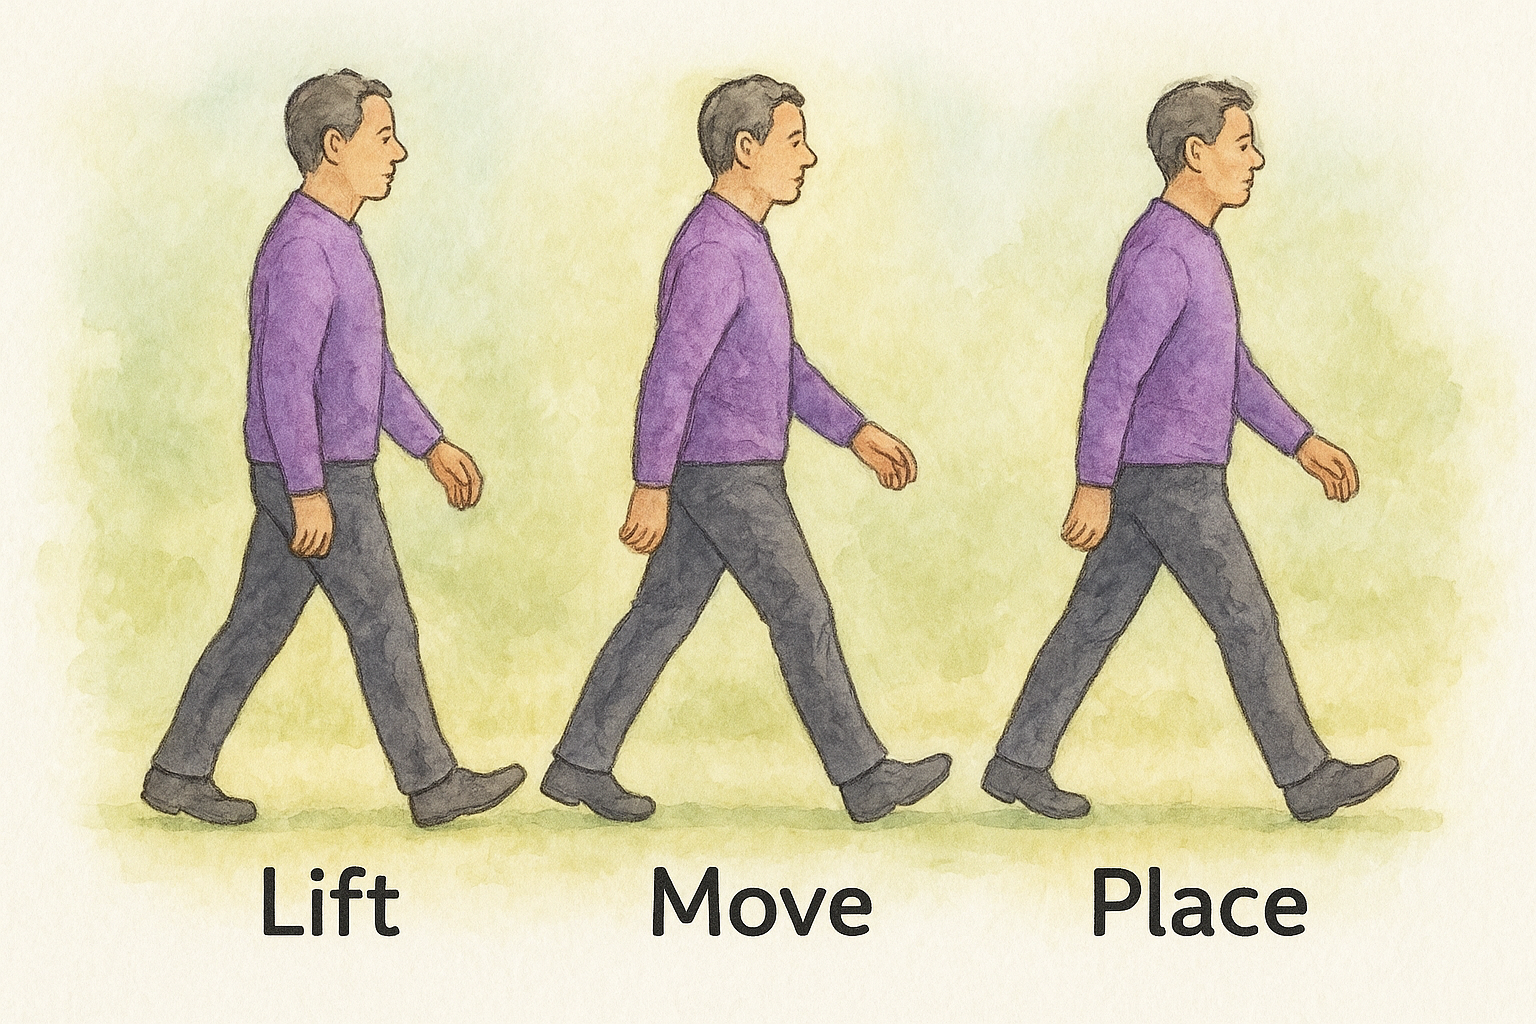
Step 5. Walk the step cycle with clear, simple labels
Now you move. With your anchor chosen and your posture set, begin walking at your reduced pace and apply simple, one-word mental labels to each phase of the step cycle. Labeling turns a blurry sequence of movement into a series of distinct, observable moments you can actually track with your attention. This is where the walking meditation steps you have prepared for start doing real work.
Break each step into three distinct phases
Each complete step divides into three phases: lifting, moving, and placing. Lifting is the moment your heel leaves the ground. Moving is the period when your foot travels forward through the air. Placing is the moment your foot makes contact with the ground again. Label each phase silently in your mind as it happens, using short, plain words that match the timing of the movement itself, not words spoken before or after the event.
Here is what one full step cycle looks like when labeled correctly:
"Lift": your heel rises and your foot begins to leave the surface
"Move": your leg swings forward while your foot is in the air
"Place": your sole meets the ground and weight begins to shift onto that foot
"Lift": the opposite heel rises and the cycle continues on the other side
Label what is happening now, not what just happened or what is about to happen.
How to apply labels without turning them into commentary
Your labels function as attention checkpoints, not descriptions you analyze or evaluate. Say "lift" when you lift; say "place" when you place. If your mind adds anything extra, such as "that felt heavy" or "I did that well," note the addition without engaging it and return to the next label in the sequence. Commentary is just another form of wandering, and you treat it exactly as you would any other distraction: notice it, release it, and return.
When you reach the end of your route and turn around, pause for one full breath before resuming. The turn is a natural reset point. Use it to re-anchor to your labels and your pace before the next length begins.
Step 6. Add the senses without losing your anchor
Once your labels feel stable across several lengths of your route, you can expand your awareness to include sensory input from your surroundings. This is one of the more rewarding stages of the walking meditation steps in this guide, because it shifts the practice from a focused drill into something closer to a full-body awareness experience. The rule is simple: your anchor stays primary, and sensory input stays secondary. The moment the senses take over, you return to the anchor.
Introduce one sense at a time
Adding all your senses at once overloads your attentional system, which is still developing the capacity to hold a moving anchor. Start with a single sensory channel, such as sound, and allow yourself to notice it briefly between label cycles. You might hear a bird call or a distant car during the "move" phase of a step, acknowledge it with a quiet internal note like "hearing," and then return immediately to "place" as your foot lands.
The same approach works for any sense: feeling air temperature on your skin, noticing light and shadow, or sensing your breath on your lips. Each brief notice follows the same pattern: one word of acknowledgment, then back to your anchor. Do not chase the sensation or analyze it further.
Sensory awareness in walking meditation is a background channel, not a new anchor.
How to practice the expand-and-return cycle
Use the following sequence each time you add a sensory moment to your walk. This template keeps your attention organized and prevents the senses from pulling you out of your anchor entirely:
Complete one full label cycle: "lift, move, place" on both feet
Allow one sensory notice: name it in one word, such as "warmth" or "sound"
Return to your anchor label on the very next step
Repeat the cycle; do not hold the sensory note beyond that single word
Most beginners find that sound and temperature are the easiest senses to add first, because both register briefly without requiring you to redirect your gaze. Reserve smell and detailed visual awareness for later sessions, once the expand-and-return cycle feels automatic rather than effortful.
Step 7. Handle distractions, discomfort, and strong emotions
Distractions are not obstacles to the walking meditation steps you are practicing; they are the raw material the practice works with. Every time something pulls your attention away from your anchor and you choose to return, you complete one full training repetition. Labeling what happened before you return gives your attention a clean re-entry point and prevents the distraction from turning into a chain of associated thoughts.
When your mind pulls away from the anchor
Your mind will leave the anchor often, and the departure usually follows a pattern: a thought appears, you follow it for several steps without noticing, and then you realize you have been somewhere else entirely. The moment you notice is the moment that matters. Apply a single neutral label to what pulled you, such as "thinking," "planning," or "remembering," and then return your attention to the next "lift" in your label cycle.
The label is not a judgment. It is a redirect signal.
Do not count how many times your attention wanders in a session. Counting converts a neutral event into a performance score, and that score becomes its own distraction. Each return is complete in itself; what happened before it does not affect its value.
When your body signals discomfort
Physical discomfort during slow walking is common, especially in the lower back, knees, or feet. Your first step is to distinguish discomfort from pain. Discomfort is a dull, low-level sensation that does not worsen as you continue. Pain is sharp, localized, or increasing. Stop walking immediately if you feel pain and rest or adjust before deciding whether to continue.
For mild discomfort, try adjusting your pace or posture first. Soften your knees, relax your jaw, and check whether you are gripping your feet against the ground. If discomfort persists through a posture adjustment, end the session early without treating it as a failure, then address the physical issue before your next session.
When strong emotions surface
Strong emotions, including grief, anxiety, or unexpected waves of sadness, sometimes arise during mindful walking because slowing down reduces the suppression that keeps them below awareness. When an emotion surfaces, apply the same labeling approach you use for thoughts: name it in one word, such as "sadness" or "fear," and return to your anchor. If the emotion is too intense to hold that structure, stop walking, find a place to sit, and let the feeling be present without the movement layer until it settles enough for you to continue or decide to end the session.
Step 8. End the walk, reflect, and bring it into your day
Ending your session with the same deliberateness you brought to the opening stillness pause completes the practice properly and helps transfer what you trained into the rest of your day. Without a clear close, the transition back into regular activity can feel abrupt, and the calm, grounded quality you built during the walk dissolves almost immediately. Give yourself 60 to 90 seconds to close the session before you pick up your phone or move on to the next task.
Return to stillness before you step back into your day
Walk to the end of your route and stop completely. Stand in the same posture you used at the opening: feet hip-width apart, gaze soft and downward, knees slightly unlocked. Take three slow breaths and direct your attention back to the soles of your feet exactly as you did at the start. Notice whether anything feels different now compared to when you began. You do not need to analyze or explain the difference; simply observe it for the length of those three breaths.
Closing the session in the same posture you opened with sends a clear signal to your nervous system that a defined practice has ended, which reinforces the habit loop over time.
Use a short reflection to consolidate what you noticed
After the stillness pause, take one additional minute to run through these three brief reflection prompts in your mind before you move on:
What pulled my attention most? Name it in one or two words.
What sensation was easiest to stay with? This is useful data for choosing your anchor next time.
Did anything shift in my body or mood during the walk? A single honest observation, not a judgment.
You do not need to write these answers down, though keeping a short session log for the first two weeks can help you spot patterns in what distracts you and what grounds you fastest.
Carry one observation into your next activity
Pick one thing you noticed during the walk, such as tightness in your shoulders or the sound of wind, and bring deliberate awareness to it for the first few minutes of whatever you do next. This single transfer keeps the walking meditation steps from being an isolated event and gradually threads mindful attention into your regular activity.
Variations, accessibility options, and quick fixes
The walking meditation steps in this guide represent one approach, not the only one. Once you understand the core structure of anchor, label, and return, you can adapt the practice to fit your environment, your body, and the time you have available. The variations below do not dilute the practice; they apply the same principles to different physical and practical conditions.
Shorter and faster formats
If ten minutes feels too long on a given day, a three-minute version works just as well for building the habit. Choose a shorter route, keep your anchor simple, and treat the session as complete when the time ends rather than when you feel a certain way. For days when you cannot slow your pace, such as walking between meetings or through a busy space, shift your anchor to breath rather than foot sensation, since breath stays accessible at any walking speed.
Consistency across short sessions builds more attentional strength than occasional long sessions you talk yourself out of doing.
Accessibility options for limited mobility
If standing balance is difficult for you, seated walking meditation applies the same principles to arm and hand movement. Sit in a stable chair, rest your hands on your thighs, and slowly lift each hand, move it forward a few inches, and place it back down. Label each phase the same way you would a foot step: "lift, move, place." The practice transfers fully, because the anchor is attentional, not postural.
For people with chronic pain or fatigue, consider these adjustments:
Reduce session length to two or three minutes and build up slowly
Use a walking aid or handrail on one side without changing your anchor
Focus your labels on the hand or arm contact with the aid rather than foot sensation
Take longer pauses at each turn to allow energy to settle before the next length
Quick fixes for the most common problems
When the practice stalls, most problems trace back to one of three causes. Use this table to identify and correct the issue quickly:
Problem
Likely cause
Fix
Mind wanders every few seconds
Pace is too fast
Cut speed in half
Labels feel mechanical and disconnected
Anchor doesn’t match current sensation clearly
Switch to breath-and-step pairing
Session ends with more tension than you started with
Route has too many interruptions
Move indoors or shorten the route
Your next mindful step
You now have everything you need to begin. The walking meditation steps in this guide give you a complete structure: stillness before movement, a single anchor, clear labels, sensory expansion, and a deliberate close. None of it requires equipment, special locations, or prior experience. Start with five minutes today, on whatever flat surface you have available, and treat completion as the only measure of success.
Walking meditation works best when it becomes part of a broader approach to how you take care of your body and mind. If you use psychedelics for personal growth or therapeutic purposes, pairing this practice with proper physical recovery makes a real difference in how clearly you process and integrate what came up during a session. Your body needs both movement-based grounding and nutritional support to fully recover. Learn more about how Afterglow’s science-backed recovery protocol can support that side of your integration.
Lukas Nelpela
writes on neuroscience, mental health, and mindful exploration. With a passion in research-driven wellness and years focused on set & setting, integration, and recovery, he turns complex ideas into clear, usable insight.
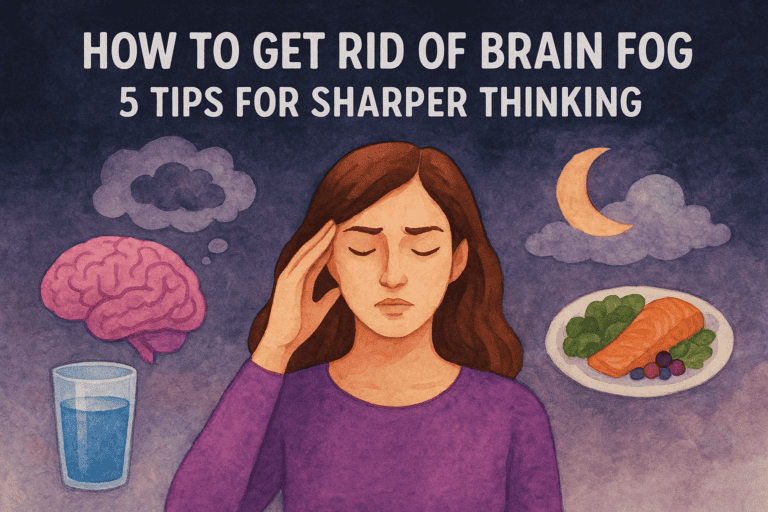
You’re staring at your screen, reading the same sentence for the fourth time, and nothing sticks. Your thoughts feel like they’re wading through wet cement. So what is brain fog, exactly? It’s not a medical diagnosis, it’s a catch-all term for that frustrating state of mental cloudiness where focus, memory,
Every process in your body, thinking, moving, recovering, runs on energy produced inside your cells. That energy comes from mitochondria, and when they’re not functioning well, you feel it: brain fog, fatigue, slow recovery, and a general sense of running on empty. Mitochondrial support refers to the nutrients, habits, and
You sit down to focus, stare at your screen, and nothing clicks. Thoughts scatter, simple decisions feel impossible, and your mind moves like it’s stuck in wet concrete. If you’ve been looking up how to get rid of brain fog, you already know the frustration, that heavy, hazy state where
Working nights, rotating schedules, or pulling irregular hours throws your body’s internal clock into a constant state of confusion. Around 20% of the global workforce does some form of shift work, and the majority of those people report poor sleep as their number one complaint. Good sleep hygiene for shift
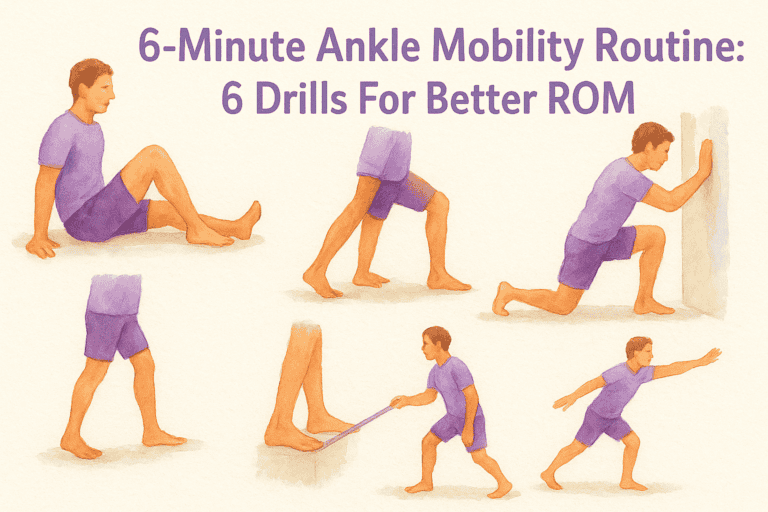
Stiff ankles affect more than just your squat depth. Limited ankle range of motion can mess with your knees, hips, and lower back, and if you spend long hours on your feet at festivals, retreats, or anywhere that keeps you moving, you’ll feel it. A solid ankle mobility routine takes
We use various cookies on our website. Some are essential for the website to function properly, while others we may only use with your consent. You can find more information about cookies on our website here.
This website uses cookies to improve your experience while you navigate through the website. Out of these cookies, the cookies that are categorized as necessary are stored on your browser as they are essential for the working of basic functionalities of the website. We also use third-party cookies that help us analyze and understand how you use this website. These cookies will be stored on your browser only with your consent. You also have the option to opt-out of these cookies. However, opting out of some of these cookies may have an impact on your browsing experience.
Necessary cookies are absolutely essential for the website to function properly. These cookies anonymously ensure basic functionalities and security features of the website.
Cookie
Duration
Description
cookielawinfo-checkbox-advertisement
1 year
Set by the GDPR Cookie Consent plugin, this cookie records the user consent for the cookies in the "Advertisement" category.
cookielawinfo-checkbox-analytics
11 months
This cookie is set by GDPR Cookie Consent plugin. The cookie is used to store the user consent for the cookies in the category "Analytics".
cookielawinfo-checkbox-functional
11 months
The cookie is set by GDPR cookie consent to record the user consent for the cookies in the category "Functional".
cookielawinfo-checkbox-necessary
11 months
This cookie is set by GDPR Cookie Consent plugin. The cookies is used to store the user consent for the cookies in the category "Necessary".
cookielawinfo-checkbox-others
11 months
This cookie is set by GDPR Cookie Consent plugin. The cookie is used to store the user consent for the cookies in the category "Other.
cookielawinfo-checkbox-performance
11 months
This cookie is set by GDPR Cookie Consent plugin. The cookie is used to store the user consent for the cookies in the category "Performance".
CookieLawInfoConsent
1 year
CookieYes sets this cookie to record the default button state of the corresponding category and the status of CCPA. It works only in coordination with the primary cookie.
elementor
never
The website's WordPress theme uses this cookie. It allows the website owner to implement or change the website's content in real-time.
fb_event_id_atc
30 minutes
Used to match client and server events for Meta Conversion API deduplication. Contains only anonymous technical IDs; no personal data stored.
fb_event_id_ic
30 minutes
Used to match client and server events for Meta Conversion API deduplication. Contains only anonymous technical IDs; no personal data stored.
fb_event_id_pur
30 minutes
Used to match client and server events for Meta Conversion API deduplication. Contains only anonymous technical IDs; no personal data stored.
fb_event_id_vc
30 minutes
Used to match client and server events for Meta Conversion API deduplication. Contains only anonymous technical IDs; no personal data stored.
rc::a
never
This cookie is set by the Google recaptcha service to identify bots to protect the website against malicious spam attacks.
rc::c
session
This cookie is set by the Google recaptcha service to identify bots to protect the website against malicious spam attacks.
viewed_cookie_policy
11 months
The cookie is set by the GDPR Cookie Consent plugin and is used to store whether or not user has consented to the use of cookies. It does not store any personal data.
VISITOR_PRIVACY_METADATA
6 months
YouTube sets this cookie to store the user's cookie consent state for the current domain.
wpEmojiSettingsSupports
session
WordPress sets this cookie when a user interacts with emojis on a WordPress site. It helps determine if the user's browser can display emojis properly.
Functional cookies help to perform certain functions, such as sharing website content on social media platforms, collecting feedback, and other third-party functions.
Cookie
Duration
Description
sib_cuid
6 months
SendinBlue sets this cookie to store unique visits.
VISITOR_INFO1_LIVE
6 months
A cookie set by YouTube to measure bandwidth that determines whether the user gets the new or old player interface.
yt-remote-cast-available
session
The yt-remote-cast-available cookie is used to store the user's preferences regarding whether casting is available on their YouTube video player.
yt-remote-cast-installed
session
The yt-remote-cast-installed cookie is used to store the user's video player preferences using embedded YouTube video.
yt-remote-connected-devices
never
YouTube sets this cookie to store the user's video preferences using embedded YouTube videos.
yt-remote-device-id
never
YouTube sets this cookie to store the user's video preferences using embedded YouTube videos.
yt-remote-fast-check-period
session
The yt-remote-fast-check-period cookie is used by YouTube to store the user's video player preferences for embedded YouTube videos.
yt-remote-session-app
session
The yt-remote-session-app cookie is used by YouTube to store user preferences and information about the interface of the embedded YouTube video player.
yt-remote-session-name
session
The yt-remote-session-name cookie is used by YouTube to store the user's video player preferences using embedded YouTube video.
ytidb::LAST_RESULT_ENTRY_KEY
never
The cookie ytidb::LAST_RESULT_ENTRY_KEY is used by YouTube to store the last search result entry that was clicked by the user. This information is used to improve the user experience by providing more relevant search results in the future.
Performance cookies are used to understand and analyze key website performance indexes, which helps in providing a better user experience for visitors.
Cookie
Duration
Description
SRM_B
1 year 24 days
Used by Microsoft Advertising as a unique ID for visitors.
Analytical cookies are used to understand how visitors interact with the website. These cookies help provide information on metrics such as the number of visitors, bounce rate, traffic source, etc.
Cookie
Duration
Description
_clck
1 year
Microsoft Clarity sets this cookie to retain the browser's Clarity User ID and settings exclusive to that website. This guarantees that actions taken during subsequent visits to the same website will be linked to the same user ID.
_clsk
1 day
Microsoft Clarity sets this cookie to store and consolidate a user's pageviews into a single session recording.
_fbp
3 months
Facebook sets this cookie to display advertisements when either on Facebook or on a digital platform powered by Facebook advertising after visiting the website.
_ga
1 year 1 month 4 days
Google Analytics sets this cookie to calculate visitor, session and campaign data and track site usage for the site's analytics report. The cookie stores information anonymously and assigns a randomly generated number to recognise unique visitors.
_ga_*
1 year 1 month 4 days
Google Analytics sets this cookie to store and count page views.
_gcl_au
3 months
Google Tag Manager sets the cookie to experiment advertisement efficiency of websites using their services.
_hjSession_*
1 hour
Hotjar sets this cookie to ensure data from subsequent visits to the same site is attributed to the same user ID, which persists in the Hotjar User ID, which is unique to that site.
_hjSessionUser_*
1 year
Hotjar sets this cookie to ensure data from subsequent visits to the same site is attributed to the same user ID, which persists in the Hotjar User ID, which is unique to that site.
_hjTLDTest
session
To determine the most generic cookie path that has to be used instead of the page hostname, Hotjar sets the _hjTLDTest cookie to store different URL substring alternatives until it fails.
CLID
1 year
Microsoft Clarity set this cookie to store information about how visitors interact with the website. The cookie helps to provide an analysis report. The data collection includes the number of visitors, where they visit the website, and the pages visited.
MR
7 days
This cookie, set by Bing, is used to collect user information for analytics purposes.
sbjs_current
session
Sourcebuster sets this cookie to identify the source of a visit and stores user action information in cookies. This analytical and behavioural cookie is used to enhance the visitor experience on the website.
sbjs_current_add
session
Sourcebuster sets this cookie to identify the source of a visit and stores user action information in cookies. This analytical and behavioural cookie is used to enhance the visitor experience on the website.
sbjs_first
session
Sourcebuster sets this cookie to identify the source of a visit and stores user action information in cookies. This analytical and behavioural cookie is used to enhance the visitor experience on the website.
sbjs_first_add
session
Sourcebuster sets this cookie to identify the source of a visit and stores user action information in cookies. This analytical and behavioural cookie is used to enhance the visitor experience on the website.
sbjs_migrations
session
Sourcebuster sets this cookie to identify the source of a visit and stores user action information in cookies. This analytical and behavioural cookie is used to enhance the visitor experience on the website.
sbjs_session
1 hour
Sourcebuster sets this cookie to identify the source of a visit and stores user action information in cookies. This analytical and behavioural cookie is used to enhance the visitor experience on the website.
sbjs_udata
session
Sourcebuster sets this cookie to identify the source of a visit and stores user action information in cookies. This analytical and behavioural cookie is used to enhance the visitor experience on the website.
SM
session
Microsoft Clarity cookie set this cookie for synchronizing the MUID across Microsoft domains.
YSC
session
YSC cookie is set by Youtube and is used to track the views of embedded videos on Youtube pages.
Advertising cookies are used to deliver relevant advertisements and marketing campaigns to visitors. These cookies track visitors across websites and collect information to deliver tailored advertisements.
Cookie
Duration
Description
_rdt_uuid
3 months
Reddit sets this cookie to build a profile of your interests and show you relevant ads.
ANONCHK
10 minutes
The ANONCHK cookie, set by Bing, is used to store a user's session ID and verify ads' clicks on the Bing search engine. The cookie helps in reporting and personalization as well.
MUID
1 year 24 days
Bing sets this cookie to recognise unique web browsers visiting Microsoft sites. This cookie is used for advertising, site analytics, and other operations.
test_cookie
15 minutes
doubleclick.net sets this cookie to determine if the user's browser supports cookies.
yt.innertube::nextId
never
YouTube sets this cookie to register a unique ID to store data on what videos from YouTube the user has seen.
yt.innertube::requests
never
YouTube sets this cookie to register a unique ID to store data on what videos from YouTube the user has seen.